
 01780 300123
FAQs and Installation Advice
How to Fit a Flexible Flue Liner - FAQs and Installation Advice
Q: Installing a wood burning stove in a masonry chimney stack
A: Below is a general guide to the components commonly used for a wood burning stove installation in a fireplace with a masonry or stove chimney stack. We'll start at the stove end and work upwards:-
Generally, you will need to use vitreous enamel stove pipe from the stove to the stack itself. This is available with or without access doors for sweeping purposes. Many stoves can be swept through the stove by removing the internal baffle plate at the top of the burner. Once you reach the stack itself, you need to decide if you need to line the chimney with a chimney liner or not. Also, if you are to line the stack, then you need to know the diameter of chimney liner you'll need. You'll need an adaptor to connect between the vitreous enamel stove pipe and the chimney liner. These are available as a standard adaptor or as an increasing adaptor if the liner is a larger diameter than the vitreous pipe.
Don't forget to order a nose cone. The nose cone is used during installation and then discarded. Attached to the leading end of the chimney liner it helps prevent snagging against the side of the stack and also provides a draw cord from which the liner can be guided down. Please note that not all manufacturers provide draw cords, so you may need to supply your own (nylon string and a washer). You'll need to close off the bottom end of the chimney stack. You can do this by using one of our register plates, together with a register plate adaptor. At the top end of the installation, there are various configurations for supporting the liner.
How to Fit a Flexible Flue Liner
PREPARATION
All installation work should be carried out by a fully qualified HETAS approved engineer. Before starting work, read the installation instructions carefully supplied with the products. Good working practices and statutory health and safety considerations should be followed. Safe workingplatforms or other means of access should be arranged to avoid accidents. Wear protective gloves, goggles and dust-masks, particularly when handling insulation, and dusty or sooty materials. There is a danger of cuts and abrasions from the liner and metal fittings.
PREPARING THE CHIMNEY
Check that the appliance and chimney arrangements are satisfactory and that the walls of the chimney are at least 100mm thick solid masonry; ensure that the chimney is structurally sound, wind proof and watertight. Clean the chimney using a brush and rods. Remove any terminals or cappings, which might effect installation of the liner.
There are two methods of installation at the top of the stack that we recommend (1) where the pot is removed to secure the liner or (2) a pot hanger or pot-hanging cowl is used therefore removal of the pot is not required – this is not recommended in an exposed area.
METHOD (1) - POT REMOVAL
- Attach the draw-cord to the nose cone. Use self- tapping screws OR strong tape to secure the nose cone to the end of the liner. Lower it into the chimney from the top, if necessary gently pulling from below using the draw-cord. When the lower end position has been determined remove the cone
- Remove the chimney pot and clear any cement and debris from the pot area.
- When the chimney liner is all the way through the flue, connect the base of the chimney liner to the appropriate adaptor using stainless steel screws and seal with fire cement.
- If you insulating the chimney do this now (see Insulation).
- Cut the liner to the desired length leaving about 100mm for the clamp to be secured and insert the Protection Sleeve into the top of the liner.
- Place the Top Plate over the liner and secure the liner in place using the Top Clamp. The clamp should secure both the liner and Protection Sleeve.
- Flaunch the Top Plate and Top Clamp and surrounding area with a suitable mortar and re-fit the chimney pot.
METHOD (2) - NOT REMOVING POT
- Attach the draw-cord to the nose cone. Use self- tapping screws OR strong tape to secure the nose cone to the end of the liner. Lower it into the chimney from the top, if necessary gently pulling from below using the draw-cord. When the lower end position has been determined remove the cone.
- When the chimney liner is all the way through the flue, connect the base of the chimney liner to the appropriate adaptor using stainless steel screws and seal with fire cement.
- If you insulating the chimney do this now (see Insulation).
- Cut the liner to the desired length – this should be to the height of the chimney pot.
- Attach the Pot Hanger or Pot Hanging Cowl to the top of the liner – the bottom spigot is inserted into the top of the liner. The straps are then tightened around the liner to form a secure hold.
- The Pot Hanger or Pot Hanging Cowl should now fit flush with the top of the chimney pot.
- If the Hanger has a strap on the outside secure this to the pot.
LINING TO APPLIANCE CONNECTION
At the bottom of the chimney, secure the liner into the socket of an appliance adaptor (MA Adaptor (20-DMA) using fire cement. For open fires, secure and seal a flue gather into the masonry gather above the fire opening. For other appliances use a minimum 600mm length of flue pipe before connecting to the appliance adaptor. Please note that the liner should be the at least the same diameter as the outlet from the appliance.
The space between the liner and the inside wall of the chimney should be sealed. A Chimney Notice Plate should be filled in and fixed in an appropriate place as per Building Regulations.
INSULATION
We recommend insulation or back filling only on tall, large or exposed chimneys. Whilst not essential, an insulated flue should ensure maximum performance and minimize condensation in the lining.
To insulate the chimney either:
- Use a loose fill granular insulating material such as Micafil, this should be mixed one part ordinary Portland cement to six parts Micafil.
- Rockwool insulating tubes.
CUTTING THE LINER
We recommend cutting the liner with a hacksaw, be sure to use protective gloves while cutting because the liner can have razor sharp edges.
Talk to one of our Technicians today for advice and information on all the components you will need for your flexible flue liner installation.
Typical Log Burner installation inside a chimney void requires:
- Vitreous flue pipe length (with or without access door)
- Vitreous to liner adaptor (MA Adaptor) or a vitreous to liner increasing adapter (MR Adaptor)
- Flue liner
- Top plate, Clamp and rain cap OR simply use a pot hanging cowl
- Nose cone
Q: What diameter multi fuel flue liner do I need?
A: The diameter of the chimney liner required depends on many things including the type of appliance and fuel/s which you are using, current building regulations, the fireplace opening size and the chimney stack height.
We'll start with chimney liners for multi fuel stoves as this is fairly straightforward. By multi fuel we mean any or all of the following fuels; cured dry logs, coal, coke, peat and smokeless fuel.
The diameter of the chimney liner will normally be the same diameter as the outlet from the stove. An average sized multi fuel stove will have a 6" (150mm) diameter outlet and the chimney liner and stove pipe will nearly always be 6" (150mm). There is an exception to this rule as follows:-
Building regulations state that if you are burning cured dry logs only, then the minimum diameter for a chimney liner should be 6" (150mm). So if the outlet from your stove is 5" (125mm) and you burn only wood, then you'll need to increase to 6" diameter chimney liner. This can either be achieved directly from the stove with an increaser in vitreous enamel stove pipe, or you can use 5" diameter stove pipe and then use an increaser liner to pipe to connect to the liner.
Can I Have a Stove if I Don't Have a Chimney? Yes You Can!
Are you wondering 'Do you need a chimney for a log burner?' Your property does NOT need to have a chimney stack, you can use a manufactured flue system called twin wall insulated flue instead to take away the flue gases from your stove. You can find our range of black and stainless twin wall flue available to buy here.
How is a Wood Burning Stove Installed Using Twin Wall Flue?
When installing a twin wall flue system there are two options: An Internal Flue System; or an External Flue System. Which type of flue route will depend on where the stove is going, what is your preference in terms of seeing the flue inside or outside, if there if room for the flue to run inside and most importantly ensuring the chosen flue route complies to HETAS guidelines and Building Regulations. Both options can be done using twin wall flue and you may need to consider if you have a top or rear exit from your stove too. You can run the twin wall flue in either or a combination of black or plain stainless twin wall flue depending on you preference for aestheitics and cost (Black twin wall flue is slightly more expensive).
What Flue Do I Need When I Don't Have a Chimney?
When there is no existing chimney you will need a Twin wall Flue system. When you've decided on where you want to install your stove and where you want the flue route to run i.e either an internal twin wall flue system or an external twin wall flue system then you can see further links below with all the flue supplies you will need. Please note: This is just a guide and you will need to check for yourself that the appropriate amounts of components relate to your building height as these are based on typical house / single story properties etc.
Buy Flue Direct's Twin wall Flue Installation Kits here.
Twin wall flue kits for your stove installation when you don't have a chimney - Available in 5" inch and 6" inch flue black and stainless. Other diameters sizes also available.
How to Install Twin wall Flue for My Stove / Wood burner - Different Flue Route Options
Q: How should a twin wall multi-fuel flue system be installed at a house running internally and with a top outlet from the appliance?
Q: How should a twin wall multi-fuel flue system be installed at a house running internally and with a rear outlet from the appliance?
Q: How should a twin wall multi-fuel flue system be installed at a house running externally and with a top outlet from the appliance?
A: All installation work should be carried out by a fully qualified HETAS Engineer. Please click here for fitting information.
Q: How should a twin wall multi-fuel flue system be installed at a house running externally and with a rear outlet from the appliance?
A: All installation work should be carried out by a fully qualified HETAS Engineer. Please click here for fitting information.
Q: How should a twin wall multi-fuel flue system be installed at a bungalow running internally and with a top outlet from the appliance?
A: All installation work should be carried out by a fully qualified HETAS Engineer. Please click here for fitting information.
Q: How should a twin wall multi-fuel flue system be installed at a bungalow running internally and with a rear outlet from the appliance?
A: All installation work should be carried out by a fully qualified HETAS Engineer. Please click here for fitting information.
Q: How should a twin wall multi-fuel flue system be installed at a bungalow running externally and with a top outlet from the appliance?
A: All installation work should be carried out by a fully qualified HETAS Engineer. Please click here for fitting information.
Q: How should a twin wall multi-fuel flue system be installed at a bungalow running externally and with a rear outlet from the appliance?
A: All installation work should be carried out by a fully qualified HETAS Engineer. Please click here for fitting information.
-
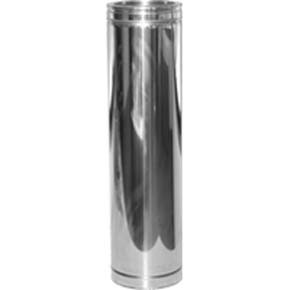
Twin Wall Flue Pipe 1 metre length (940mm installed) (020) - 130mm Dia
-
Twin Wall chimney flue Pipe 440mm (024) - 150mm Dia
-
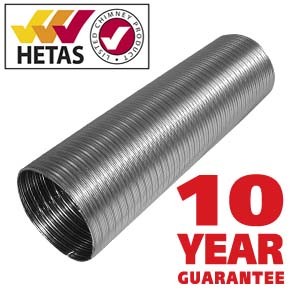
Flexible flue liner 316 grade multi fuel - 150mm 6 inch
-
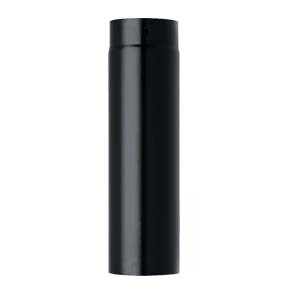
Standard Vitreous Enamel steel pipe
-
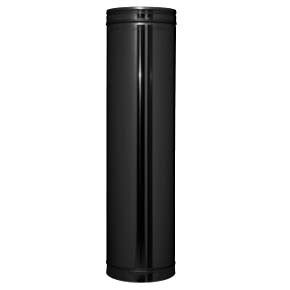
Black Twin wall Flue 440mm - 150mm Dia